
Looking to get into photography, or maybe looking to upgrade to full frame without breaking the bank? Here is the setup we recommend that will rival the photo quality of any $10k equivalent setup. And as always, we prioritize the photographer over the gear. Because someone with a good eye, who knows how to use their equipment, will ALWAYS get better shots with any equipment, than someone with the best gear who doesn’t know how to use it. So in this edition of NT Recommends, we look at cameras and lenses give the absolute best quality for the price in the current market.
Camera Body
We start off with the camera body. We have two recommendations, one used camera (with a 6-month warranty) recommendation for those who are searching for the best price and one new camera recommendation for those who can spend a little more to get a tad more quality and a manufacturer’s warranty.
Starting off with the best value. This particular camera body is one that was released in 2020 and has some of the most advanced technology that allows for incredible autofocus and image quality. Enjoy this beautiful piece of gear, the Canon R6.

Canon r6
$1200 - $1300
Pure speed. Pure mirrorless. The radical EOS R6 features technology that will have you falling in love with photography all over again. See and shoot subjects in completely new ways and add a new dimension to your visual story telling.
Next, we have the updated version of this camera for those who want to buy a new (or used for a slight discount) camera and get a little bit newer technology while maintaining a tremendous amount of value. Enjoy the Canon R6 Mark 2

Canon r6 mkii
Stills or video, action or portrait – the EOS R6 Mark II’s blend of performance and image quality lets your creativity thrive. Be creative without compromise. The EOS R6 Mark II’s breakneck speed, class-leading performance and professional filmmaking features let you master your craft – however you like to shoot.
lens adapter
With the new Canon R series cameras, came a new lens mount. The Canon RF mount is the new lens mount for the Canon R series cameras and the new RF line of Canon lenses. Now, while the new Canon RF lenses are incredible, they offer a very minor upgrade in quality for a tremendous difference in price when compared to the older EF line of lenses.
Canon EOS-R to EF lens mount adapter

Since we are always aiming at the best value in camera gear, we recommend getting a Canon lens adapter to allow the Canon R series cameras to work flawlessly with the Canon EF line of camera lenses. This allows for a much better quality-to-price ratio when choosing lenses.
If you purchase one of the cameras above, you will NEED to purchase this adapter to allow the camera to function with the lenses we will be recommending below.
Lenses
Along with a great full-frame camera body, we need the right lenses to get the perfect photos. The trick to getting high-quality photos with any camera is having the right lens. So with this recommendation, we pair the camera body with two incredible lenses at unbelievable prices. The 28-75mm F2.8 zoom and the classic 50mm 1.8 prime lenses.
This first lens comes in at less than $200 and has comparable image quality to similar lenses that cost over $2000.

Tamron 28-75mm F/2.8
The smallest and lightest standard lens of its class. Its luminosity makes "Available Light" photography an absolute pleasure. It belongs to the Super performance ( SP) class of Tamron lenses distinguished by ultra high optical and mechanical quality. It has very good resolution capability, strongly reduced light fall off up to the edges, Sharp and excellent pictures are the result. Furthermore, the depth of field which is rather wide due to the construction of the digital image sensors can be reduced by the big diaphragm aperture.
The second lens also comes in at less than $200 and is one of the greatest lenses that is a must have for all camera bags.
Canon 50mm F/1.8
Perfect for the beginner. The Canon EF 50mm f/1.8 II lens offers great image quality. Its affordable price makes it an exciting option for the photographer looking to improve their craft. The fast aperture opens doors to photographing in low-light surroundings, without the weight and cost of other lenses.

Which lens is for what?
Like most people, we don’t care much for the technical jargon about gear. At the end of the day, all we want is to know what the lens will do and when we should use it. So here is what you need to know about these lenses.
Tamron 28-75 f/2.8
The Tamron 28-75mm f/2.8 is a budget equivalent to the age-old classic professional lens, the 24-70mm f/2.8. If you don’t know what that means, no worries, it just means that for a couple of hundred dollars, the Tamron lens can get nearly identically high-quality photos as the professional $2000 dollar lens.
The F/2.8 aperture means that all of your photos taken at F/2.8 will isolate your subject well and create a beautiful blurry background. The contrast of your sharp subject on a blurry background makes this lens produce incredibly sharp photos.
This lens being a zoom lens means it gives you a great range. On the full frame camera body when zoomed out at 28mm you are as wide as you would nearly ever need to be for any type of lifestyle photos you may come across in your everyday life. And at the long end of 70mm, this lens will get you close enough to capture most anything you may need to zoom in on. And while it isn’t the zoomiest of zooms, it does a great job at getting you close to the action when needed.
While this lens is not considered a macro lens, the relatively short minimum focal range, coupled with the 70mm zoom focal length, can really get close to details in your everyday life in a way that brings the small-scale world to life in your photos.
In summary, this lens will be what you have on the camera most of the time, because it has such a great range, amazing depth of field for those blurry backgrounds and sharp subjects, and just overall excellent image quality. This will be your everyday run-and-gun lens.
AKA: This is your go-to everyday lens :)
Canon 50mm f/1.8
The Canon 50mm f/1.8 is one of the all-time classic lenses that belongs in every photographer’s arsenal. While it has no ability to zoom, as it is a prime 50mm focal length, what it lacks in versatility it makes up for in creativity and image quality.
The 50mm focal length is the equivalent focal length of the human eye when on a full-frame camera body. This means that with the 50mm lens, you are able to take photos that capture a true-to-life, and incredibly natural feel.
The F/1.8 aperture means that all of your photos taken at F/1.8 will isolate your subject very dramatically, to the point where you can have the tip of the nose sharp and in focus in a photo and the eye can be out of focus.
As you can guess, this means you need to be precise with your focus with this lens, but when you take the extra time to be precise and focus right where you want, the images you get out of this lens are exquisite.
The “professional” feel of most pro photography comes from the extremely shallow depth of field achieved by these types of lenses. So if you want the type of photos that separate you from the standard cell phone photographer, this is the lens you want on your camera.
In summary, this lens will be what you have on the camera when you want to take creative, personal, and intimate photos that highlight a very intentionally selected part of the photo. The shallow depth of field creates extremely blurred backgrounds that pull your subject off the background and create the dreamy and highly focused photos sought after by most professional photographers.
AKA: This lens will make your images look professional :)
other lenses we recommend
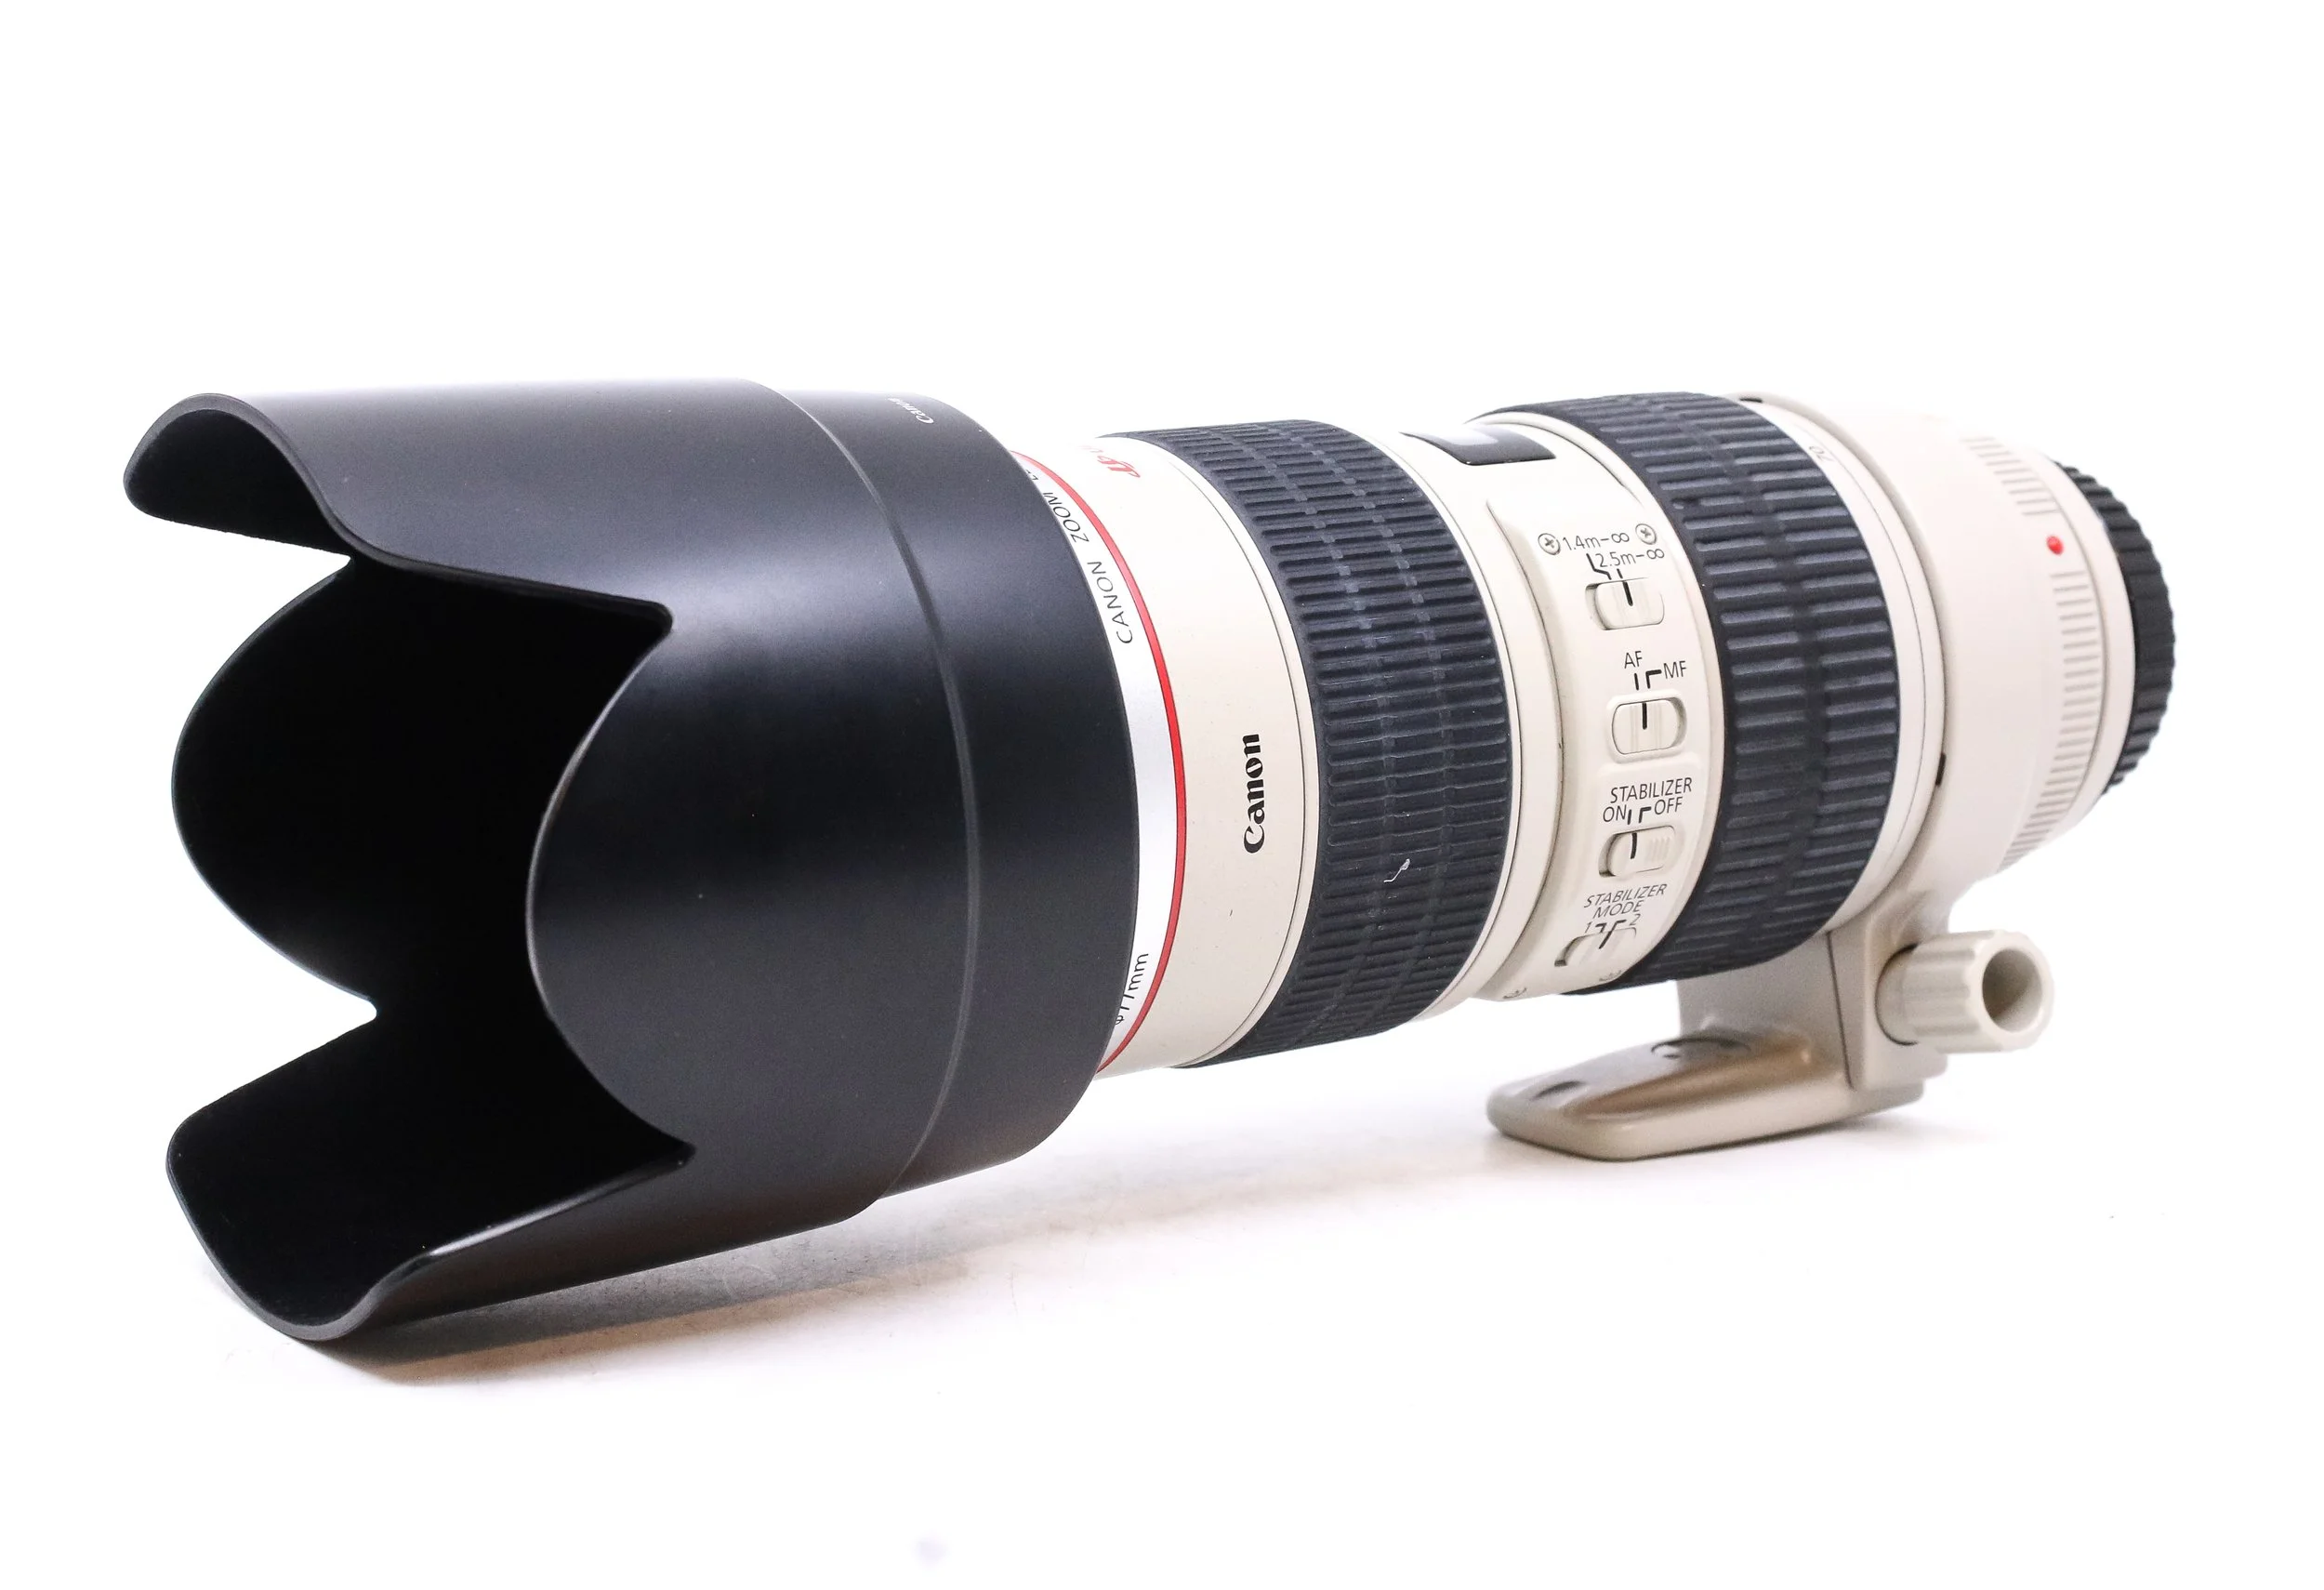
indoor sports / portraits
Canon 70-200mm F2.8 IS
Landscapes
Sigma 14-24 F2.8

outdoor Sports / Wildlife
Sigma 150-600mm F5-6.3

advanced portraiture
Canon 85mm F1.2

recommended camera settings
We always recommend taking a class or watching a youtube video to get a a grasp of how to use your camera. But, once you do that, and have a foundation of how to adjust your camera’s settings, here are the settings we recommend using for these camera and lens combinations.
Always shoot in AV mode
Setting #1 - “Aperture Value” mode
We won’t go into detail here, but fomost photographers, amateur and professional alike, we recommend always shooting in AV / A mode. This mode is clearly marked on the mode dial on the top of your camera, and will also be displayed in the top corner of your camera’s display screen.


Setting #1 adjustment
While shooting in AV mode, the only settings you will be able to change on your camera are the Aperture and ISO. These settings are normally indicated by a number following the letter “F” on the bottom of your camera’s display. We recommend that no matter the lens and/or shooting environment, that you always keep your eye on this setting and make sure to keep your “F” number as low as possible. For the two lenses we recommended above, those numbers would be F2.8 for the Tamron lens, and F1.8 for the Canon 50mm lens.


Setting #1 Dial location
To adjust this setting, you will usually turn one of your top dial knobs on your camera to the left until the setting stops at is lowest F value.
This dial is often the one directly behind the shutter button on the top right of your camera.
For the Canon R6 Mark 2, the image shows the location of this dial.
Keep your ISO as low as you can
Setting #2 - ISO
And the final setting to know, would be the ISO. Now if you have plenty of light, such as being outside in the day, you should keep your also keep your ISO as low as possible. This will usually be ISO 100.
Now, if you are indoors or somewhere with less light, at ISO 100 you will notice that any motion happening in the frame will show up blurry in your photos. This means you will want to raise the ISO up. We recommend starting it ISO 800 or 1600, taking a few shots, and seeing how the photos look. If this stops the motion blur from showing up in the photo, leave it there. If it is really dark in the environment, you may need to raise the ISO higher. You can raise it as high as you need, just know that as you raise the ISO you will introduce “Noise” into your images, which will lower the overall quality of the photos.


Setting #2 adjustment
The ISO setting can sometimes be a little trickier to change. It is usually adjusted by one of the other dials on the top of your camera, or by pressing a button labeled “ISO” followed by adjusting a dial.
For the R6 mark 2, the ISO adjustment is done by turning the dial shown in the image below.
Affiliate Disclosure
Some of the links on this page are affiliate links, meaning I may earn a small commission if you make a purchase—at no extra cost to you. These commissions help me keep doing what I’m passionate about: creating valuable content, sharing what I’ve learned, and supporting my family. Your trust and support mean a lot to me and my family.